
एउटा नयाँ कम्प्युटर एसेम्बल गर्नुभयो र कसरी Windows 11 स्थापना गर्ने भनेर सोच्दै हुनुहुन्छ? ओएस बिना कुनै पनि कम्प्युटरमा विन्डोज स्थापना गर्न मद्दतको लागि यहाँ एउटा गाइड छ।

नयाँ पीसी निर्माण गर्नु रमाइलो हुन सक्छ, यदि तपाइँ यो पहिलो पटक गर्दै हुनुहुन्छ भने केहि हदसम्म कठिन प्रक्रिया। यदि तपाइँ केहि चुनौतिहरूको सामना गर्नुहुन्छ भने पनि, तपाइँलाई तपाइँको लागि एक छिटो (सम्भवतः) अनुभव छ भनेर थाहा पाउँदा पहिलो पटक यसलाई खोल्ने भावनाको लागि यो सामान्यतया लायक छ... यो हो, जब सम्म तपाइँ महसुस गर्नुहुन्न कि तपाइँ अझै पनि एक स्थापना गर्नु पर्छ। अपरेटिङ सिस्टम, जस्तै Windows 11, र हामी यहाँ तपाईंलाई मद्दत गर्न यहाँ छौं।
नयाँ पीसीमा Windows 11 स्थापना गर्न विशेष गाह्रो छैन, जबसम्म तपाइँ तपाइँको पीसीले प्रणाली आवश्यकताहरू पूरा गर्दछ भनेर सुनिश्चित गर्नुहुन्छ। साँच्चै, तपाईले हराइरहेको एक मात्र चीज हो TPM 2.0 समर्थन, जुन धेरै मदरबोर्डहरूले हाल सम्म सम्मिलित गरेका थिएनन्, तर तपाई जाने सम्भावना धेरै छ। यद्यपि, प्रक्रियाले केही समय लिन्छ र तपाईंले केही उपकरणहरू प्रयोग गर्नुपर्नेछ जससँग तपाईं परिचित हुनुहुन्न। तैपनि, हामी तपाईंलाई नयाँ-नयाँ मेसिनमा Windows 11 स्थापना गर्ने प्रक्रियामा मार्गदर्शन गर्नेछौं, यद्यपि यो पनि प्रयोग गर्न सकिन्छ यदि तपाईं पहिले नै भएको PC मा OS को सफा स्थापना गर्न चाहनुहुन्छ भने। सुरु गरौं।
Creating installation media
- Go to the Windows 11 download page and look for the section called Create Windows 11 Installation Media. Click the Download now button that's under it.
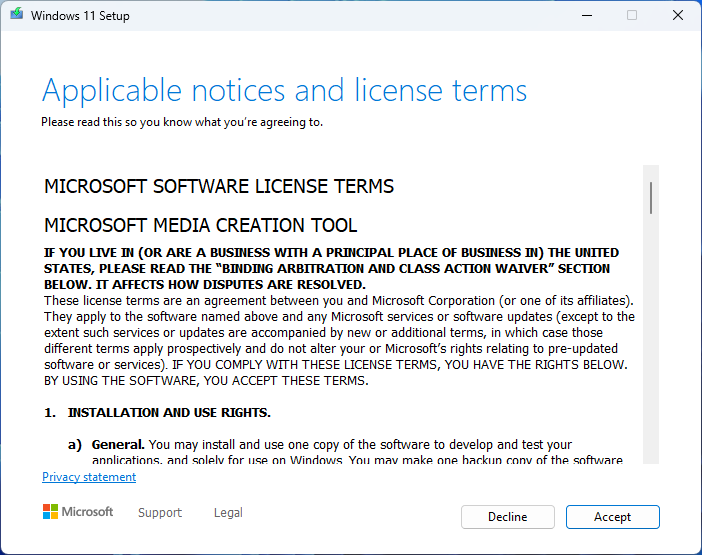
- Once the file finishes downloading, run it and click Accept.
- You'll be asked to choose the language you want Windows 11 to be in. By default, it will match your current system, but you can change it if you need to. Click Next.
- Installation media can either be an ISO file or a flash drive, but only the flash drive will work if you're using a new PC. Select USB flash drive and click Next.


- Next, you'll see a list of all the USB drives connected to your PC. Because this process will delete all the data on the drive, we recommend unplugging everything except the drive you're planning to use to avoid any mistakes. Select the correct drive and click Next.
- Windows 11 will begin downloading and files will be transferred to your flash drive. Once it's done, your flash drive will be ready to be used as installation media.
Using Rufus to create a bootable USB drive
- Follow the process above, but instead of choosing USB flash drive, choose ISO file when prompted. Alternatively, ISO files are available for direct download on the Windows 11 download page.
- Download Rufus from the official website.
- Connect the USB flash drive to your PC and run Rufus. Just like before, it's best to unplug any other drives, since this process deletes all the data on the drive you select. Choose the appropriate drive at the top of the window.
- Click the SELECT button near the top and choose the ISO file you downloaded previously.

- Some default settings will be selected, which you shouldn't need to change. Click START near the bottom of the window.
- You'll see a series of options, in a pop-up, but you don't need to change anything here. By default, Rufus will disable compatibility checks so you can install Windows 11 on PCs that don't meet all the requirements. Click OK.

7. Rufus will start transferring the installation files to the flash drive. Make sure to leave it plugged in until it's finished.
तपाइँसँग अब Windows 11 को लागि स्थापना मिडिया हुनेछ, जुन तपाइँ स्थापना सुरु गर्न तपाइँको नयाँ पीसी मा प्लग गर्न सक्नुहुन्छ।
Installing Windows 11 on your PC
- Plug in the USB drive into the PC where you want to install Windows 11 and power on the computer.
- Since there's no boot drive inside the PC, it should boot from your USB flash drive by default.
- If this doesn't work, you may need to press Esc, F1, F11, F12 or another key on your keyboard during boot. The exact key will vary depending on the brand of your motherboard, so you'll need to refer to the manufacturer's instructions to open the boot menu, or you may need to go into the BIOS settings.
- If your motherboard has a boot menu, you should be able to see a list of available drives to boot from, and you'll want to choose your flash drive from the list. Otherwise, navigate the BIOS to find the boot options and move your flash drive to the top of the list of boot devices.

- Once you've booted from the flash drive, you'll be asked to choose a language, region, and keyboard layout. Click Next, then Install now on the next screen.
- You'll be asked for a product key to activate Windows. You should have bought a license, but if you want to enter the product key later, you can click I don't have a product key. If you do have one, enter it and then click Next.
- If you didn't enter a product key, you'll be asked to choose the version of Windows 11 you want to install. It will most likely be either Windows 11 Home or Pro, but you'll want to choose the right edition so the product key can work correctly later. Click Next.


- Accept the license agreement.
- In the next screen, click Custom: Install Windows only (advanced).
- You should see a list of drives on your PC, and you can choose where you want to install Windows 11. You can also create multiple partitions if you want, but otherwise, simply select the drive and click Next.
- Windows 11 will now begin installing, so just wait until it finishes.
एक पटक यो स्थापना गरिसकेपछि, तपाइँ Windows 11 आउट-अफ-बक्स अनुभव (OOBE) मार्फत निर्देशित हुनुहुनेछ। यो उही कुरा हो जुन तपाईंले ब्रान्ड-नयाँ ल्यापटपमा वा पीसी रिसेट गरेपछि देख्नुहुन्छ, र यो बुझ्नको लागि एकदम सजिलो हुनुपर्छ। यदि तपाइँ अनुभवको यस भागको बारेमा थप जान्न इच्छुक हुनुहुन्छ भने, तपाइँ यो गाइड जाँच गर्न सक्नुहुन्छ।तपाईंले भर्खरै निर्माण गर्नुभएको नयाँ पीसीमा Windows 11 स्थापना गर्ने बारे तपाईंले जान्नु आवश्यक छ। यो प्रक्रिया धेरै वर्षको लागि प्रायः अपरिवर्तित रह्यो, त्यसैले यदि तपाईंले यो पहिले गर्नुभयो भने यो परिचित हुनुपर्छ। अवश्य पनि, यदि तपाइँ डुअल-बुट गर्न चाहानुहुन्छ भने चीजहरू अलि बढी गाह्रो हुन्छन् Windows 11 र लिनक्स, उदाहरणका लागि।


0 Comments